

Introduction
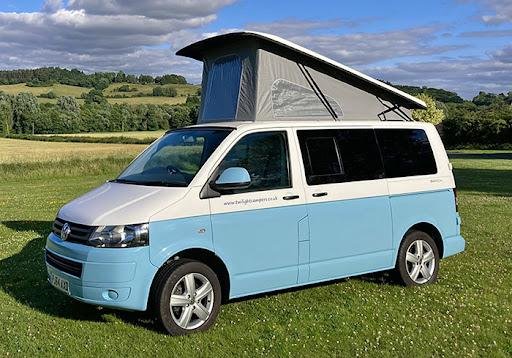
Welcome to my painting world. This blog is going to discuss painting a Mighty campervan for less than 200 pounds. So I have my T5 campervan. I bought it from Jason the other week. It was first made by a guy called Paul at Tamar Wheels as their show vehicle to represent their company. They do wheels and tyres and then James bought it probably six years ago. It’s done a few bits, but I really want to make it my own. So I’ve done a few bits inside already like I painted the bumpers, but today we’re going to be tackling that red paint on my campervan. I sanded the entire van with 400-grit sandpaper with the advice of a professional from a campervan bodyshop. It’s not the tidiest van, so I won’t spend weeks filling in every dent. Instead, I’ll leave it as is, but I’ll discuss with you how we’re going to paint it for less than 200 pounds.
Preparation
So, I went into it a little bit on the last blog where I did the bumpers…
But as we discussed earlier, I picked this van up a couple of weeks ago as I was looking for a new campervan. Jason was struggling to sell this because of its unique looks with the stack exhaust and bits like that. I thought… you know – I mean I can put my stamp on this van and really make it my own. So firstly, i got rid of the exhaust and put a standard wing on. It was a challenging task, and I didn’t want to film it. I spent a long time using a reciprocating saw to cut through the exhaust because it was a single solid piece.
The paint we will be using comes from a campervan body shop called Campervan Coachworks. It’s called Montana Gold, a satin finish graffiti paint. You can get really wide nozzles for it, which gives you a great spread. It covers nicely, and typically, you can paint a whole van with about 12 cans. We analysed the whole van from a professional campervan bodyshop and they guided me in a very easy approach.
The Painting Process
So I’m going to be starting off with that, the familiar paint we’ve used before on a drift car. This time, though, after the paint, I’m planning to coat it with a gloss UV-resistant varnish. I’m not sure how shiny it’s going to get, but I really want to give it a try.
Previous Experiences with the Paint
We’ve applied this paint in a campervan bodyshop with the normal lacquer on the drift car, and I’ve used it on my camper van, which I kept matte. So today, we’re experimenting with the UV-resistant varnish which should hopefully prevent the paint from fading and add some shine to it.
Cost and Materials
So far, I’ve spent about 150 pounds on the paint and roughly 30 pounds on masking tape and other materials needed to mask up the van properly. I also painted the door yesterday to get those done beforehand.
Paint Usage
I ended up using more cans than I initially wanted to; I used three cans just on the door shuts, so I’m down to 11 cans to do the rest of the van.
Plan for Painting
What I’m going to do is pull the van into the barn and start painting both sides first, then the bonnet, and then the boot.
PS — We’re definitely on a farm here; it’s quite the setting for such a project.
Additional Supplies
I’ve got six more cans on order, and they’ll be here by Tuesday. So, if worse comes to worst, I might have to mask up the boot and do that separately.
Getting Started
Let’s get in the barn, get it prepped, and get it sprayed because we are in for a really hot day. It is best to work in a cooler environment like the barn which offers some respite from the heat and a controlled setting for spraying.
By organising the painting in this structured way, making sure we have enough materials, and using the barn to manage the environmental factors, we aim to achieve a good finish on the van. We are also experimenting with the UV varnish to see how it enhances the appearance and durability of the paint job. This systematic approach should help manage resources effectively and achieve the desired finish efficiently.
Conclusion
Getting the van prepped wasn’t as challenging as I initially thought. I was quite anxious at first, but with a bit of guidance from a campervan bodyshop and using a few bricks and some wood, we managed to get the van into position. Now, I’ve got it raised up for easier access to the lower sections.
Preparing the Van
I’m going to remove the rear lights; however, I’ll leave the front ones untouched for now since I might not even make it that far—I suspect I haven’t ordered enough paint. The next steps involve masking the wheels and the roof, and I’ll also cover the windows. The rear lights and the badge need to be removed, too.
Painting Process
Once everything is masked and ready, it’s time to start painting. I plan to give the paint an hour to dry since it dries pretty quickly, and then I’ll apply the clear coat. This rapid drying paint is quite efficient, so it should not take too long before I can proceed with the varnish.
Writing the Process
So, let’s get into it now. I’ll keep writing the entire process. This will help capture the step-by-step method, potentially assisting others who might want to undertake a similar project. It’s a good way to document the effort and the techniques used for both educational and reference purposes.
By keeping the process transparent and documented, it provides a real-time look into the practical challenges and solutions encountered during this type of DIY project. This approach not only helps in managing the task at hand but also serves as a valuable learning tool for similar future endeavours.
For More Articles: https://tigerworks.org/
More Stories
The Ultimate Cabo San Lucas Bachelorette Party Checklist
Dubai Desert Safari Tours: A Journey into the Heart of Arabia
Exclusive Desert Safari Dubai: Private & Premium Adventures Await